
Step by Step Instructions for Importing Photos Using Adobe Bridge CC
Launch Adobe Bridge CC
1. From the Main Menu Bar choose File > Get Photos From Camera… This will launch the Adobe Bridge CC Photo Downloader.
2. Click Advanced Options on the bottom left of the dialog box to see and choose thumbnails of the images on your card.
3. At the top left choose your image source (camera or card) Get Photos from… If you have a card or camera plugged in Camera Downloader should read it automatically. If not use the pulldown menu to choose Refresh List.
4. Select the images you want to download by checking them.
5. Choose the Location you want to save the images to…
6. Create subfolders if you want… Optional.
7. Rename Files… Give your photos a useful file name, I.E. vacation2012_001, etc. Choosing Advanced Rename will allow you to create a custom template for renaming. Highly recommended!
8. Leave Preserve Current Filename in XMP.
9. Choose whether or not to Save or Delete images after downloading.
10. Add Metadata like Owner and Copyright (Optional).
11. Click Get Media.
Using Adobe Bridge CC Camera Downloader
Importing Into Photoshop Elements
Launch Photoshop Elements > Organizer
In the main menu at the top of the screen choose File > Get Photos & Videos.
If you have your camera or a memory card plugged in to your computer choose From Camera or Card Reader…OR on the top left of the main screen click Import > From Camera or Card Reader…
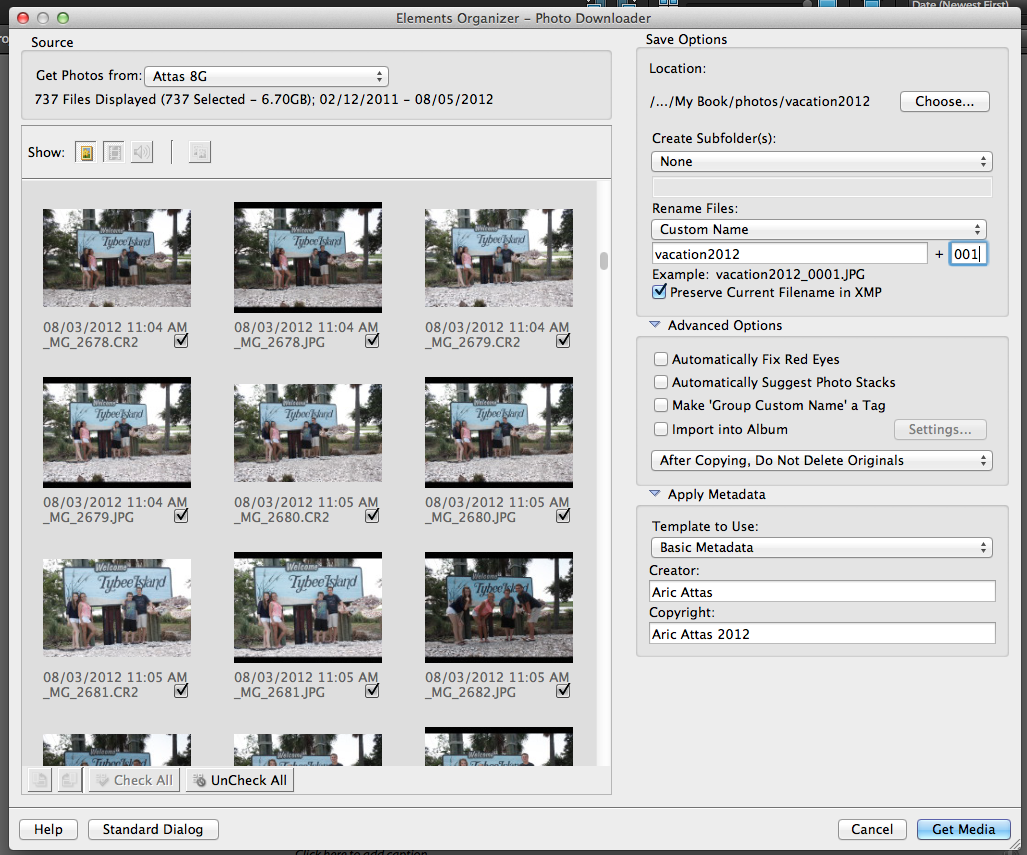
1. The Adobe Photoshop Elements Camera Downloader will open.
2. Click Advanced Options on the bottom left of the dialog box to see and choose thumbnails of the images on your card.
3. At the top left choose your image source (camera or card) Get Photos from… If you have a card or camera plugged in Camera Downloader should read it automatically. If not use the pulldown menu to choose Refresh List.
4. Select the images you want to download by checking them.
5. Choose the Location you want to save the images to…
6. Create subfolders if you want… Optional.
7. Rename Files… Give your photos a useful file name, I.E. vacation2012_001, etc. Choosing Advanced Rename will allow you to create a custom template for renaming. Highly recommended!
8. Leave Preserve Current Filename in XMP.
9. Choose whether or not to Save or Delete images after downloading.
10. Add Metadata like Owner and Copyright (Optional).
11. Click Get Media.
Using Photoshop Elements Camera Downloader
If you have files on your computer already choose From Files or Folders…
Browse your computer, select the images you want to add and click Get Media.